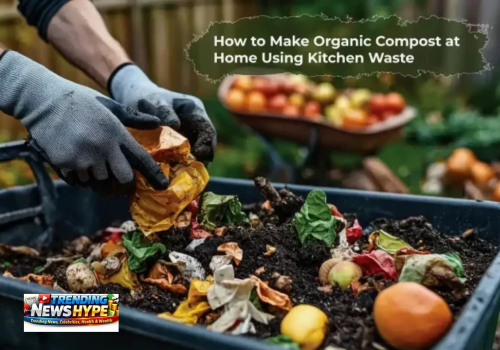
Most people throw away vegetable peels, fruit scraps, and tea bags every single day without realising they are throwing away free fertiliser. Composting is just the process of letting that waste break down into something your plants can actually use — and it is far simpler than most guides make it sound. On a low budget, we can manage our garden. Every home has waste, so we can use it in the garden.
This article covers everything you need to start composting kitchen waste at home, including what to put in, what to keep out, how to set it up in a small space, what goes wrong and why, and what to do with the finished compost once it is ready. Read More: Benefits of Growing Vegetables in Containers
What Kitchen Waste Composting Actually Is
Composting is a natural process. Organic material, such as vegetable peels, fruit scraps, coffee grounds, and dry leaves, breaks down over time with the help of moisture, air, bacteria, and small organisms like worms and fungi. The result is dark, crumbly, nutrient-rich material called compost, which works as one of the best natural fertilisers you can give a plant.
The difference between a compost pile that works and one that smells terrible and attracts insects usually comes down to two things: the balance of wet and dry materials, and whether you are turning it regularly. Get those two things right, and the rest largely takes care of itself.
The science behind why this works is straightforward. A healthy compost pile contains billions of microorganisms per gram of material. These bacteria and fungi generate heat as they consume organic matter, and an active pile can reach internal temperatures of 55 to 65 degrees Celsius at its core.
At those temperatures, weed seeds and most harmful pathogens are destroyed, which is why finished compost is safe to apply directly to edible plants. According to the United States Environmental Protection Agency (EPA), composting diverts approximately 30 per cent of household waste away from landfills. In a landfill, the same organic material breaks down anaerobically and produces methane, a greenhouse gas roughly 25 times more potent than CO2. Composting at home converts that same waste into a useful soil amendment instead.
Things we can Compost In our Garden
The following materials break down well and are safe to compost:
- Vegetable peels and scraps — onion skins, carrot tops, potato peels
- Fruit scraps — banana peels, apple cores, citrus rinds in small amounts
- Tea leaves and used tea bags (remove the bag if it is plastic-sealed)
- Coffee grounds and paper coffee filters
- Eggshells — these break down slowly but add calcium to the finished compost
- Dry leaves, cardboard torn into small pieces, and newspaper
- Plain cooked rice or bread in very small amounts, if buried deep in the pile
The general rule is that anything that came from a plant can go in. The more variety you add, the richer the finished compost tends to be.
The general rule is that anything that came from a plant can go in. The more variety you add, the richer the finished compost tends to be.
In composting terms, materials are divided into two categories: greens and browns. Greens are nitrogen-rich wet materials — vegetable scraps, fruit peels, coffee grounds, and fresh grass clippings. Browns are carbon-rich dry materials — cardboard, newspaper, dry leaves, and straw. The ideal ratio for fast, odour-free composting is roughly 3 parts browns to 1 part greens by volume. Too many greens and the pile becomes wet, compacted, and smelly. Too many brown, s and it dries out and stops breaking down.
Coffee grounds are classified as green despite their brown colour and are one of the most nitrogen-dense kitchen waste materials available — used grounds contain approximately 2 per cent nitrogen by weight, comparable to many commercial fertilisers. Banana peels are among the fastest-breaking kitchen scraps, typically decomposing within two to five weeks. Eggshells are among the slowest, often taking six months or more unless crushed finely before adding.
What You Should Never Put In
These materials will cause problems — bad smells, slow breakdown, or pests:
- Meat, fish, and bones
- Dairy products, including cheese, milk, and yoghurt
- Oily or greasy food
- Heavily spiced or sauced cooked food
- Pet waste
- Diseased plant material
The reason these cause problems is that they either break down anaerobically, meaning without oxygen, which produces a foul smell, ell or they attract rats, flies, and other pests to your compost container. Keep these out completely.
Meat and dairy decompose through a different bacterial process than plant matter. The anaerobic bacteria responsible for breaking them down produce hydrogen sulphide and ammonia as byproducts, which are the compounds responsible for the rotting smell. Beyond odour, meat and fish scraps emit signals that attract rodents from significant distances.
A 2019 study on urban composting barriers found that fear of pests and odour was the primary reason households stopped composting after starting. Diseased plant material is worth treating with particular caution — common fungal diseases like blight and powdery mildew can survive in a cool, slow compost pile and reinfect your garden when you apply the finished compost. If a plant showed signs of disease, bin it rather than compost it unless you are confident your pile reaches the high internal temperatures needed to kill pathogens.
How to Set Up a Compost Container at Home
You do not need to buy anything special. A plastic bucket with a lid, an old drum, a clay pot, or even a wooden crate works fine. The one requirement is to drill or punch several small holes around the sides and bottom of whatever container you use. Without air, the pile goes anaerobic and starts to smell.
If you are composting on a balcony or in a small apartment, a five to ten-litre bucket with a lid is enough for a single household. Keep it in a shaded spot away from direct sunlight, which dries it out too quickly.
Step one: Add a dry base layer first. Torn cardboard, dry leaves, or shredded newspaper about three to four centimetres deep. This layer absorbs excess moisture and keeps the bottom from getting soggy.
Step two: Add your kitchen scraps on top. Vegetable peels, fruit scraps, coffee grounds, eggshells.
Step three: Cover each layer of wet kitchen waste with a thin layer of dry material — more cardboard, dry leaves, or soil. This is the most important habit to build. Every time you add kitchen waste, add a dry layer on top. This controls moisture, reduces smell, and keeps the balance right.
Step four: Every three to four days, mix or turn the contents with a stick or trowel. This introduces oxygen, which speeds up decomposition significantly. A pile that is never turned takes much longer and is more likely to develop smell problems.
Step five: Check the moisture level when you mix it. The compost should feel like a wrung-out sponge, damp but not dripping. If it is too wet, add dry material. If it is too dry, sprinkle a small amount of water. Read More: Best Time to Grow Tomatoes at Home for Beginners
Container size matters more than most beginner guides acknowledge. A container that is too small loses heat quickly and never reaches the internal temperatures that speed decomposition. The minimum effective volume for a hot compost pile is generally considered to be around 1 cubic metre for outdoor bins.
For apartment and balcony composters working at a smaller scale, a cold composting approach at lower temperatures is perfectly fine — it simply takes longer, typically eight to twelve weeks rather than three to six. Drilling holes at 10cm intervals around all sides of a bucket or container provides adequate airflow for small-scale cold composting. Keeping the container in a shaded spot is more important for apartment setups than most guides mention — direct sunlight on a small container heats the outer layer too quickly, killing the beneficial bacteria near the walls while the centre stays cool and inactive.
How Long Does It Take
In warm weather with regular turning, kitchen compost in a small container is typically ready in three to six weeks. In cooler temperatures or if you are turning it less frequently, it can take eight to twelve weeks.
You will know it is ready when it looks dark brown or black, smells earthy rather than rotten, and you can no longer identify the original materials. It should look and feel like rich, crumbly soil.
Temperature is the single biggest variable in how fast compost finishes. Decomposition speeds up significantly as the temperature rises. At 10 degrees Celsius, microbial activity is slow, and a pile may take four to six months. Then, at 25 to 30 degrees Celsius, the same pile finishes in four to eight weeks.
At the optimal range of 55 to 65 degrees Celsius inside an active outdoor pile, it can be ready in as little as two to three weeks with regular turning. For apartment composters who cannot generate enough mass for a hot pile, the practical target is eight to ten weeks in summer and twelve to sixteen weeks in winter. A simple way to speed up a slow pile without adding heat is to add a handful of finished compost or garden soil from a plant pot — this introduces an established colony of decomposing bacteria that accelerates the process noticeably within a few days.
Common Issue and How Would We Solve Prblem
It smells bad:
This almost always means too much wet material and not enough dry material. Add a generous layer of torn cardboard or dry leaves, mix it thoroughly, and make sure the lid is not sealing out all airflow. The smell should reduce within a day or two.
Nothing seems to be breaking down:
Either the pile is too dry, you are not turning it often enough, or the pieces are too large. Chop or tear materials into smaller pieces before adding them —a smaller surface area means faster breakdown. Turn it every two to three days instead of weekly and check moisture levels.
There are fruit flies around the container.:
This usually means kitchen scraps are sitting on the surface, exposed to air. Always bury fresh additions under a layer of dry material and make sure the lid fits properly. Citrus peels on the surface can also attract flies — bury these immediately after adding.
The compost is too wet and slimy:
Too many wet kitchen scraps are added at once without enough dry material to balance them. Add a thick layer of dry cardboard or leaves, mix well, and leave the lid slightly open for a day to allow some moisture to escape.
Reducing piece size is the single most effective way to speed up a stalled pile. The microorganisms responsible for decomposition work on the surface area of each piece of material. Cutting vegetable scraps into pieces smaller than 5cm roughly doubles the available surface area compared to adding them whole, which directly accelerates breakdown.
Coffee grounds and tea leaves break down fastest of all kitchen scraps because they are already fine-grained with high surface area. Newspaper and cardboard break down faster when torn into pieces smaller than 10cm and moistened slightly before adding. A pile that has gone completely inactive — no warmth, no reduction in volume over several weeks — almost always needs two things simultaneously: moisture brought up to the damp-sponge level, and aeration through thorough mixing. Doing one without the other rarely fixes the problem.
What Went Wrong for Me — and What I Learned
No composting guide feels entirely honest without admitting that things go wrong, especially at the start. Most people hit at least one problem in their first attempt, and the ones who give up usually do so because they did not know what caused it or how simple the fix usually is.
The most common first experience is smell. A new composter adds a week’s worth of vegetable peels, closes the lid, and opens it a few days later to find something that smells unmistakably like rot. This happens because the kitchen scraps went in without any dry material to balance them, the container has no airflow, or both. It feels like a failure. It is not. Adding a generous handful of torn cardboard, mixing thoroughly, and drilling a few extra holes in the container fixes this within 48 hours in most cases.
The second common problem is fruit flies. A small cloud of them appears around the container within a week. This happens when fresh scraps are sitting on top of the pile, uncovered. The fix is simple: every time you add kitchen waste, bury it under a layer of dry material immediately. Never leave fresh scraps exposed on the surface. Once this habit is established, fruit flies are no longer a problem.
The third issue, which is less dramatic but more discouraging, is a pile that simply does nothing. No breakdown, no reduction in volume, no warmth. People assume composting has failed. Usually, it means the pile is too dry, the pieces are too large, or both. Sprinkle water until the material feels like a damp sponge, chop everything into smaller pieces, and turn it thoroughly. Within a week,k there is usually visible progress.
The lesson from all three problems is the same: composting does not fail permanently. Every issue has a straightforward cause and a fix that takes less than ten minutes.
Compost Troubleshooting at a Glance
| Problem | Most Likely Cause | Fix |
|---|---|---|
| Bad smell, rotten odour | Too many wet scraps, not enough dry material | Add cardboard or dry leaves, mix thoroughly, yd and check airflow holes |
| Ammonia smell | Too much nitrogen-rich material (grass, food scraps) | Add more carbon browns, turn pile |
| Fruit flies around container | Fresh scraps exposed on surface | Bury all additions under dry layer, check lid fits properly |
| Nothing breaking down | Pile too dry, pieces too large, or not turned enough | Add water to damp-sponge level, chop materials smaller, turn every 3 days |
| Pile too wet and slimy | Too many wet scraps added at once | Add thick layer of dry cardboard, mix, leave lid slightly open for one day |
| White mould visible | Normal fungal activity in a cold pile | Not a problem — leave it or mix it in, it speeds breakdown |
| Pile not heating up | Too small a volume or too dry | Add more material to increase mass, check moisture, turn thoroughly |
| Pests getting in | Meat, dairy, or cooked food added | Remove offending material, secure lid, check for gaps in container |
Most problems appear in the first two to three weeks and resolve within a few days of applying the correct fix. A problem that does not improve after a week usually means two issues are present at the same time — check both moisture and material balance before assuming something more serious is wrong.
The Composting Timeline: What Happens at Each Stage
Understanding what the pile is doing at each stage removes most of the uncertainty beginners feel, especially during the first two weeks when nothing looks like it is working.
Days 1 to 5 — Setup and first activity. The pile looks exactly like a container of kitchen scraps because that is what it is. Bacteria that were already present on the food surfaces begin colonising the material. No visible change yet. The pile may feel slightly warm if you press into it. This is the right sign. If it smells bad already, the greens-to-browns ratio is off — add dry material.
Days 6 to 14 — Active decomposition begins. Softer materials like fruit scraps, coffee grounds, and tea leaves show visible breakdown. The pile starts to reduce slightly in volume. In warmer conditions, the centre of a well-managed pile is noticeably warm to the touch. Fruit flies appear at this stage if fresh scraps are exposed on the surface.
Weeks 3 to 4 — Mid-stage. Volume has reduced by 30 to 50 per cent. Original materials are harder to identify. The pile smells earthy rather than rotten if the balance is right. Eggshells, cardboard, and tougher vegetable matter are still visible. Turning at this stage is particularly effective because it moves cooler outer material into the active centre.
Weeks 5 to 8 — Finishing stage. The pile looks increasingly like dark soil. Most original materials are no longer identifiable. Volume is roughly 30 to 4per centtnt of the original. The smell is distinctly earthy. Worms may appear at the base of outdoor containers at this stage, which accelerates the final breakdown significantly.
Weeks 8 to 12 — Ready to use. Compost is dark brown to black, crumbly, and smells like forest floor. Eggshells may still be visible but are soft enough to crumble. This is finished compost. It can be sieved to remove any remaining large pieces, which go back into the next batch.
In cooler temperatures or with less frequent turning, each stage takes roughly twice as long. The stages are the same — only the pace changes.
How to Use the Finished Compost
Once your compost is dark, crumbly, and earthy-smelling, it is ready to use. Here is how to use it effectively: Mix two to three centimetres of compost into the top layer of potting soil in containers or pots. For garden beds, work it into the top ten centimetres of soil before planting.
When potting new plants, replace up to a third of the potting mix with finished compost for a significant improvement in soil quality. Apply a thin layer around established plants as a top dressing — this feeds the soil slowly as it is watered in.
Do not use too much at once. Compost is concentrated, and applying thick layers can actually overwhelm plants with too many nutrients. A little used regularly is far more effective than a large amount applied once.
Frequently Asked Questions
Can I compost in a small apartment with no outdoor space?
Yes. A five-litre bucket with a lid kept on a balcony or even under a kitchen sink works for a single household. Manage the moisture carefully, turn it regularly, and keep the dry-to-wet balance right, and there will be no smell issues.
How often do I need to turn it?
Every three to four days is the sweet spot for fast composting. You can turn it less often, but decomposition will slow down significantly.
Why do my eggshells never seem to break down?
Eggshells take much longer than other kitchen waste — sometimes several months. Crush them as finely as possible before adding them to speed up the process. They are still worth adding for the evaluation, even though they are slow.
Can I add citrus peels?
Yes, but in moderation. Large amounts of citrus can make the compost too acidic, and can slow down the breakdown. Add them in small quantities mixed with other scraps rather than all at once.
Conclusion
Composting kitchen waste is one of the most practical habits a home gardener can build. It costs nothing, reduces household waste, and produces genuinely useful fertiliser that improves soil quality in a way that shop-bought products often cannot match.
The setup takes ten minutes. The maintenance takes a few minutes every few days. The results show up in healthier plants, better soil, and a noticeably smaller amount of waste going into your bin each week.
Start with a bucket, your vegetable peels, and some torn cardboard. That is genuinely all you need. Read More: Hydroponic Gardening for Beginners

Ali is a home gardener and plant enthusiast with five years of hands-on experience growing vegetables, herbs, and indoor plants. Alex started gardening on a small apartment balcony and has since expanded to raised beds, container gardens, and a growing collection of indoor tropicals. The focus at Trending News Hype is simple: practical advice that actually works, written from real experience rather than theory. Ali Hassan also contributes gardening content based on years of practical experience with home gardens, container planting, and indoor plant care. His articles focus on simple, effective techniques that help beginners and experienced gardeners grow healthier plants with confidence. Together, the team shares reliable, experience-based advice to make gardening easier and more enjoyable for everyone.